Covalence Waterwrap -Weld After Backfill Shrink Sleeves
Wrap around pipe sleeve with thermal indicator (ideal for large diameter water pipe where internal welding will take place). Waterwrap-WAB is known as Waterwrap 1.0-2.0.
Materials Needed:
1. Appropriate size Waterwrap WAB shrink sleeve and WPCPIV Closure Patch.
2. Polyken 939 Filler is needed when pipe wall thickness is 1/4" or greater and is optional when wall thickness is less than that.
3. Torch with a regulator that can maintain a broad, bushy, yellow flame.
4. Propane gas tank, hose and gauge
5. Standard safety equipment including but not limited to: gloves, goggles, hard hat, safety shoes
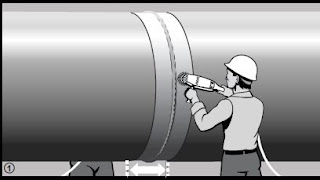
1. Surface preparation: Clean pipe surface and adjacent coating of all mud, oil, grease, rust and other foreign contaminants in accordance with SSPC-SP3 Power Wire Brush Cleaning. Remove all grease contamination by solvent cleaning the pipe and adjacent coating in accordance with SSPC-SP-1. Clean the full circumference of the pipe a minimum of 4 inches onto the existing coating and lightly abrade this area using Wire Brush or 60 grit approved sand paper.
2. Preheat joint area and most primary coatings to approximately 68F minimum. Under no circumstances shall the Waterwrap sleeve be installed on pipe surface with visible moisture. For PU coatings, preheat must be in the range of 100F to 140F to ensure ultimate performance of the Waterwrap on the PU.
Remove the protective release plastic from the coated sleeve. Center sleeve over the weld area so it is evenly overlapping adjacent pipe coating. Wrap snugly around the pipe so that the Covalence logo runs around the pipe. Overlapping ends of the sleeve should align evenly. Position overlap to permit easy access for installing closure. Select sleeve width that overlaps onto the mill applied coating by a minimum of 50mm (2") after application.
For application during cold climate conditions, follow these recommended steps:
Pipe must be preheated to 122F to 140F. Preheat with a high output torch. Shoot for a torch output of 250,000 when shrinking the Waterwrap weld after backfill. For pipe sizes larger than 40", use four people to heat and apply the shrink sleeve. For pipe sizes less than 40", two installers can be used for the Waterwrap weld after back fill.
Both the Weld After Back Fill Waterwrap and the Polyken 939 mastic filler should be maintained at a minimum of 68F until time to install. This could mean keeping them in a heated vehicle or storage shed. Flame the edge of the mainline coating before installation of the WAB waterwrap shrink sleeve to remove moisture and preheat the factory applied coating. .
WPCPIV Closure application:
1. Using a torch, adjust the flame length to approximately 20" to produce a blue tipped yellow flame. Using the yellow portion of the flame, heat the closure evenly until the pattern of the fabric reinforcement is visible. With a gloved hand and roller, smooth any wrinkles by working outward from the center.
Using the torch, begin to shrink the Waterwrap Weld After Backfill sleeve at its center, circumferentially around the pipe using a constant paintbrush motion, until the embossed pattern on the sheet surface has changed to a smooth surface.
Continue heating toward one end of the sleeve, followed by the other. During shrink down of the Weld after backfill shrink sleeve, occasionally check adhesive flow with a finger. Wrinkles should disappear automatically. Remember to wear gloves. While sleeve is hot, press or roll overlap and closure area to remove any air voids.
Sleeve is fully recovered when all of the following have occurred:
Waterwrap has a smooth surface
There are no cold spots on the sleeve surface
Weld bead profile can be seen through the sleeve
After sleeve is cool, mastic flow is evident on both edges
The sleeve has fully conformed to the pipe adjacent coating
The pattern on the backing has disappeared and the backing is a smooth surface


No comments:
Post a Comment