Visit our website: www.jsicoatings.com
Call: (936) 321-3333
Email: steve@jsicoatings.com
Showing posts with label R65 REPAIR. Show all posts

Wednesday, February 7, 2024

Powercrete R65/F1 50ml Repair Cartridges

 How to Repair Damage to Epoxy Pipe Coatings

     It is a simple fact of life:  things get damaged.  ESPECIALLY things that are moved with heavy machinery.  Pipe coatings are damaged regularly and when that happens, an effective means of making a quick, but technically sound, repair in the field is needed.  That is where Powercrete R65/F1 50ml Repair Cartridges come in.  They rebuild that damaged area into a coating that is just as effective as the original coating was coming off the production line.  Here is how they work:

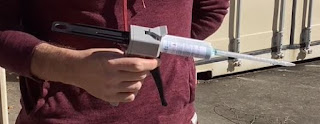
R65 dispenser gun
Powercrete R65/F1 50ml Repair cartridges are generally sold by the case.  That case includes:  25 of the 50ml repair cartridges, 1 dispenser gun and 50 of the static mixing tips.  In this photo, you can see dispenser gun assembled and the cartridge loaded up, ready to go.

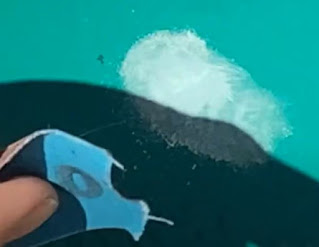
damaged epoxy coating
Here is an example of a gouge on an epoxy pipeline coating.  This one was intentionally made with a screwdriver, but often times pipe can be damaged as it is moved, as it is transported, or as it is being worked on.  This could even include weld spatter.

surface prep R65 epoxy
The first step to repairing that pipeline and using the Powercrete R65 repair cartridge is to clean the area around the damaged area.  We need proper surface preparation to give the repair epoxy an anchor pattern to bond to.  Here we can see that the sand paper was able to do that.  We will also wipe away all dust, dirt and grease using a suitable rag and solvent cleaner.

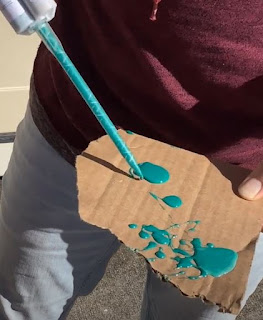
F1 50ml repair
When you begin dispensing the material, the first "bit" is set to the side.  This is to be certain that the epoxy is properly mixing, and that the ratio of the epoxy is suitable.  

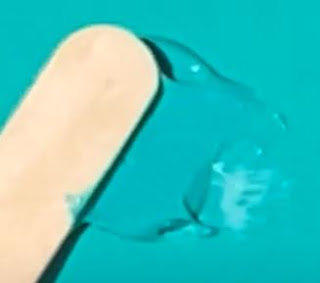
fixing pipe damage.
From there, using a stir stick or a brush or an applicator pad, the freshly mixed epoxy is applied to the damaged area of the pipe.  The installer will full fill any and all gouges, scratches, etc in order to re-create a homogenous epoxy coating. 


repaired FBE
The material cures VERY quickly.  Based on the ambient temperatures the day this repair was completed, the repair F1 was tacky within minutes and fully cured shortly after.


Here is a short and brief video showing these same steps.

If you have question:  Reach out!
Steve@jsicoatings.com
936/321-3333


Friday, January 26, 2024

Everything to know about Powercrete R65/F1 50ml Cartridges

EVERYTHING TO KNOW ABOUT POWERCRETE R65/F1 50ml CARTRIDGES

POWERCRETE R65 50ML

Powercrete R65 50ml 

   In the world of pipeline coatings, it is inevitable to come across areas in your coating that have been nicked, cut and damaged.  It is a very common need to make repairs on your pipe coatings for a variety of reasons.  Whether it was bumped by a piece of equipment or just your common epoxy pin holes, you will need to rehab this area.  That's where our Powercrete 50ml cartridges come into play.  These are a user-friendly way to make small repairs in your Powercrete coatings.  These are meant to repair every type of Powercrete products from Powercrete J, R65/F1, R95 to Powercrete DD.  The cartridge itself contains both Part A and Part B, in a perfect ratio for the perfect mix with the supplied static mixing tip.  It will slide into a supplied applicator gun and is then ready for use.  

Steps for using our Powercrete R65 50ml repair cartridges:

Step 1- Surface Prep

Clean the area of any dirt and particles.  Make sure to clean around the area at least 1 inch from where the damage occurred.  Remove any rust on the steel surface.  (you may use Acetone or other suitable solvents that do not leave any residue.  Clear any grease, oil and moisture from the area.  

Step 2 - Assemble The Cartridge

Slide the cartridge directly into the applicator gun.  You will notice that the cartridge is capped at the end.  Twist out the cap and push then turn the static mixing tip into place.  The cartridge is then ready for use.  The material will be mixed inside of the static mixing tip and dispense the material.  

Step 3- Application

Dispense the material over your damaged area.  Spread around with a spatula or your desired tool while the material is still wet.  Apply the material in an even thickness over the damage.  Then allow the material a small amount of time to cure.  (This is a fast cure product).  Repeat process on all damaged areas. 

Contact me with any questions regarding Powercrete

Drew - 936/321-3333

Drew@jsicoatings.com